wildfly-server-setup
How to Set Up a WildFly Server
1. Introduction
In this tutorial, we explore the different server modes and configurations of the JBoss WildFly application server. WildFly is a lightweight application server with a CLI and an admin console.
Before we get started, though, we need to make sure we have a JAVA_HOME variable set to a JDK. Anything after version 8 will work for WildFly 17.
2. Server Modes
2.1. Standalone
For Linux, we’d do:
~/bin/add-user.shOr for Windows:
~\bin\add-user.batThe admin user will already exist; however, we’ll want to update the password to something different. Updating the default admin password is always best practice even when planning to use another account for server management.
The UI will prompt us to update the password in option (a):
Enter the details of the new user to add.
Using realm 'ManagementRealm' as discovered from the existing property files.
Username : admin
User 'admin' already exists and is enabled, would you like to...
 a) Update the existing user password and roles
 b) Disable the existing user
 c) Type a new username
(a):
After changing the password, we need to run the OS-appropriate startup script:
~\bin\standalone.batAfter the server output stops, we see that the server is running.
We can now access the administration console at http://127.0.0.1:9990 as prompted in the output. If we access the server URL, http://127.0.0.1:8080/, we should be prompted with a message telling us that the server is running:
Server is up and running!This quick and easy setup is great for a lone instance running on a single server, but let’s check out domain mode for multiple instances.
2.2. Domain
As mentioned above, the domain mode has multiple server instances being managed by a single host controller. The default number is two servers.
Similarly to the standalone instance, we add a user via the add-user script. However, the startup script is appropriately called domain rather than standalone.
After running through the same steps for the startup process, we now hit the individual server instances.
For example, we can visit the same single instance URL for the first server at http://127.0.0.1:8080/
Server is up and running!Likewise, we can visit server two at http://127.0.0.1:8230
Server is up and running!We’ll take a look at that odd port configuration for server two a bit later.
3. Deployment
Let’s use Spring Boot Hello World. With a slight modification, it’ll work on WildFly.
First, let’s update the pom.xml to build a WAR. We’ll change the packaging element and add the maven-war-plugin:
<packaging>war</packaging>
...
<build>
  <plugins>
    <plugin>
      <groupId>org.apache.maven.plugins</groupId>
      <artifactId>maven-war-plugin</artifactId>
      <configuration>
        <archive>
          <manifestEntries>
            <Dependencies>jdk.unsupported</Dependencies>
          </manifestEntries>
        </archive>
      </configuration>
    </plugin>
  </plugins>
</build>
Next, we need to alter the Application class to extend SpringBootServletInitializer:
public class Application extends SpringBootServletInitializerAnd override the configure method:
    @Override
    protected SpringApplicationBuilder configure(SpringApplicationBuilder application) {
        return application.sources(Application.class);
    }
Finally, let’s build the project:
./mvnw packageNow, we can deploy it.
3.1. Deploy an Application
Firstly, we log in to the console using the admin user and password set earlier.
Click Add → Upload Deployment → Choose a file…
Secondly, we browse to the target directory for the Spring Boot application and upload the WAR file. Click Next to continue, and edit the name of the new application.
Lastly, we access the application by the same URL – http://127.0.0.1:8080/. We now see the application output as:
Greetings from Spring Boot!As a result of the successful application deployment, let’s review some of the common configuration properties.
4. Server Configuration
4.1. Common Configuration Properties
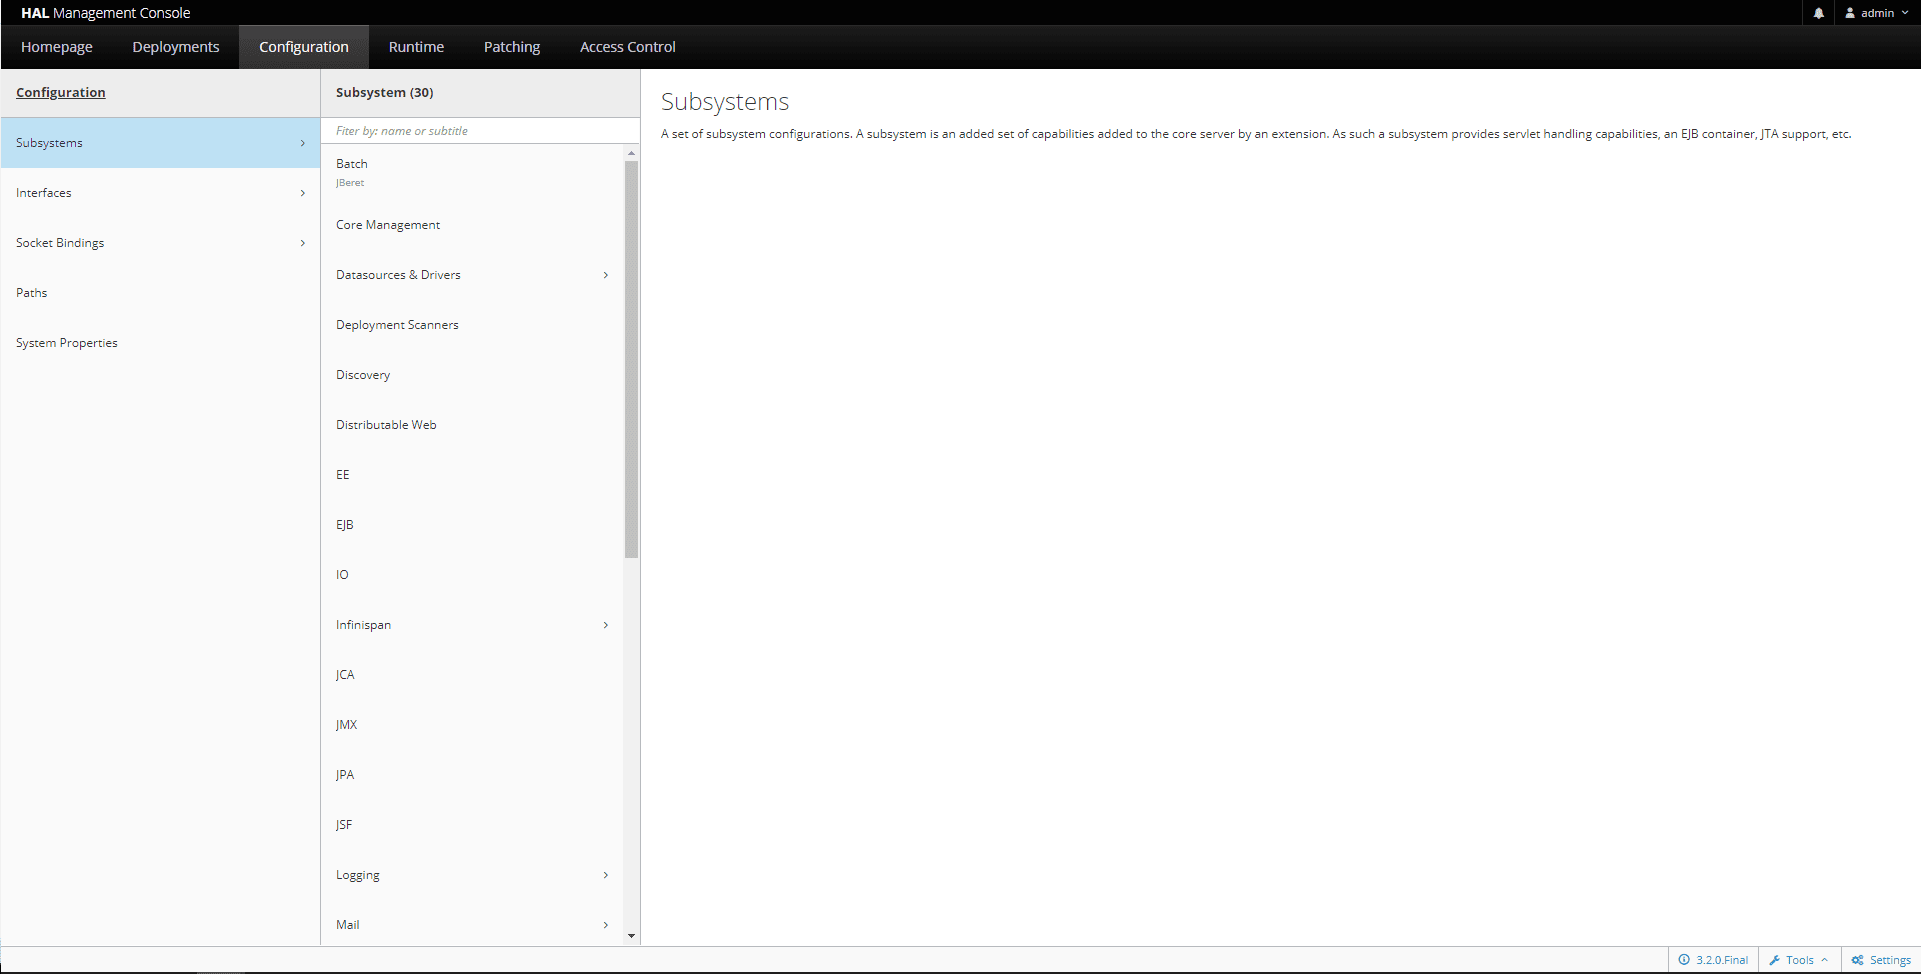
First of all, let’s take a look at the Subsystems — each one has a statistics-enabled value that can be set to true for runtime statistics:
Under the Paths section, we see a couple of the important file paths being used by the server:
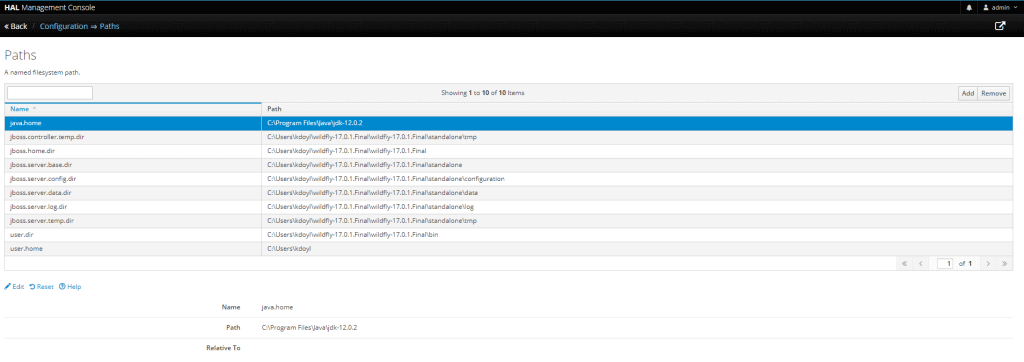
As an example, using specific values for the configuration directory and log directory is helpful:
jboss.server.config.dir
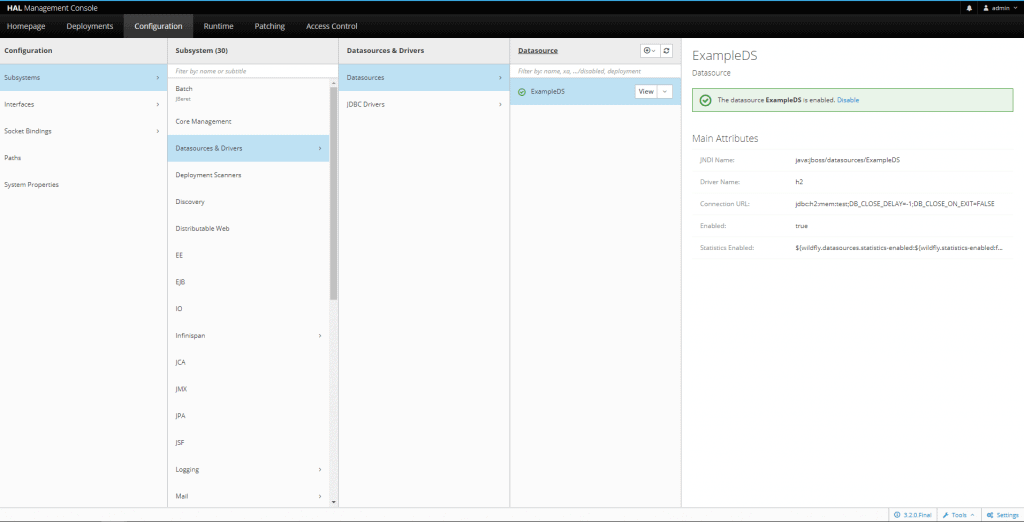
jboss.server.log.dirwIn addition, the Datasources and Drivers section provides for managing external data sources and different drivers for data persistence layers:
In the Logging subsystem, we update the log level from INFO to DEBUG to see more application logs:

4.2. Server Configuration Files
Remember the server two URL in domain mode, http://127.0.0.1:8230? The odd port 8230 is due to a default offset value of 150 in the host-slave.xml configuration file:
<server name="server-one" group="main-server-group"/>
<server name="server-two" group="main-server-group" auto-start="true">
  <jvm name="default"/>
  <socket-bindings port-offset="150"/>
</server>
However, we can make a simple update to the port-offset value:
<socket-bindings port-offset="10"/>Consequently, we now access server two at URL http://127.0.0.1:8090.
Another great feature of using and configuring the application in a convenient admin console is that those settings can be exported as an XML file. Using a consistent configuration through XML files simplifies managing multiple environments.
5. Monitoring
The command-line interface for WildFly allows for viewing and updating configuration values the same as the administration console.
To use the CLI, we simply execute:
~\bin\jboss-cli.batAfter that we type:
[disconnected /] connect
[[email protected]:9990 /]
As a result, we can follow the prompts to connect to our server instance. After connecting, we can access the configuration in real-time.
For example, to view all current configuration as XML when connected to the server instance, we can run the read-config-as-xml command:
[[email protected]:9990 /] :read-config-as-xmlThe CLI can also be used for runtime statistics on any of the server subsystems. Most importantly, CLI is great for identifying different issues through server metrics.
6. Conclusion
In this tutorial, we walked through setting up and deploying a first application in WildFly as well as some of the configuration options for the server.
The Spring Boot sample project and export of the XML configuration can be viewed on GitHub.